May 16, 2014

Spring & Summer 2014 Favorite Nail Polish

SHOP MY POLISH FAVORITES.....

It's time for a little recap now that the weather is absolutely beautiful and summer is just around the corner. A few weeks ago I shared my top picks for spring/summer 2014 nail polish. So here are my picks for this year!


I hope you enjoyed my picks! What are your favorite polishes for this year's warm weather? Don't forget to check out my vid HERE!

February 14, 2014

PINK & BLACK VALENTINE'S DAY NAILS

Happy Valentine's Day to you all! In the spirit of the day I thought it only appropriate to share my Valentine's Day nails with you. I opted for something a bit different this year. Normally you'll find a red polish on my nails, but this year I wanted to step outside the heart shaped box and pull out the pink polish.

I went with two pinks. The first is Muchi Muchi by essie. Such a beautiful baby pink polish. The other is Neon & On & On by China Glaze. I wanted a pink with a punch and this is THE polish. It's bright and bold and perfect not only for today, but for the months ahead!

This Valentine's Day nail look is super cute and super easy. Here's how you can achieve this look:

1. Paint all nails except the ring finger with a white base polish. All of the bright China Glaze nail polish really pop when they sit on a white base. I used Sally Hansen's White On. Allow to dry completely before moving on.

2. Once white polish is dry paint two coats of Neon & On & On over top. Allow to dry.

3. Now paint the ring finger with two coats of Muchi Muchi and allow to dry.

4. When all nails are dry paint Neon & On & On onto a wedge makeup sponge. You will want to measure the distance across your ring finger and then cut the sponge accordingly.

5. Dab sponge onto tip of ring finger nail working from tip towards the cuticle stopping about 1/4 of the way. Allow to dry.

6. Now using a dotting tool and some black nail polish. I used essie's licorice. Create a heart shape on the ring finger. Allow heart to dry completely before applying top coat or it will smudge.

7. Finally apply a top coat to the nails to lock in manicure and give a radiant shine. I love my essie good to go top coat. It makes my nails look like a gel manicure!

That's it! Like I said really easy, but will look like you had the pros do it!

Tweet me a pic of your Valentine's Day manicure- @beautybykendrac

Here's What I Used:

February 11, 2014

SPRING 2014 NAILS: BARE METALLICS

polish left to right: Love & Beauty in Metallic Silver, Nicole by OPI in It Starts With Me, essie in topless & barefoot

I have a fever- Spring fever that is. With Spring just around the corner I have been secretly begun rearranging my nail polish, pulling any color to the top bin that reminds me of fresh cut flowers or the thought of sun kissed skin. The transition has begun and being the nail polish addict that I am I wanted to start a mini series on my blog called Spring 2014 Manicure Must-Haves where I will feature some hot nails trends that I will be wearing as we spring into the new season. No pun intended.

A look that I absolutely love for Spring 2014 is playing matchy-matchy with nudes and metallic colors. I think having staple nudes in your polish collection is a must for this year, but to add some glam pair your favorite nude with a metallic or two. 


This look is fresh, clean and perfect for Spring.  I opted for Essie's Topless & Barefoot because it is the absolute perfect nude and works brilliantly with any skin tone. I wanted metallic colors that would compliment Topless & Barefoot so I selected a basic metallic silver polish from Love & Beauty, which is so beautiful and really inexpensive. I have had nothing but amazing results from these polishes- so if you can find Metallic Silver [Forever 21 bin digging required]  I suggest grabbing it stat!! I also added in another metallic nail polish called It Starts With Me from Nicole by OPI. This color really works year round, but looks especially amazing with a tan.

Remember to have fun with your polish placement. This Spring is a great year to really play with multiple polishes per manicure. It's something new and playful, but looks really put together if you choose your polishes correctly!

What nudes and metallic polishes do you suggest for Spring 2014?


November 15, 2013

The Nail Files: Camo Nails For Fall


A few posts ago I talked about how much I was loving the whole Fall camo trend that was happening. I have seen this trend come and go over the years and never paid too much attention to it, but something clicked for me this year and I am obsessed!!

There are so many creative ways to turn camo glam- by adding heels to a pair of camo jeggings or a statement necklace to a camo print tee! The possibilibes are endless this year and nails should be no exception!

I was browsing through Pinterest [me browsing through Pinterest- strange right ha ha] and kept stumbling into all this camo, so today's post is dedicated to the camo Fall trend that is sweeping this season. The Nail Files presents...The Camo Fall Nail.

Here's what I used [see photo above]:

Essie Mink Muffs
Essie Stylenomics
Butter London British Racing Green
Essie Licorice
Love & Beauty Taupe

Here how you can achieve this camo nail trend:

1. Paint the little finger, pointer finger, and thumb with 2 coats of Stylenomics. This is such a gorgeous deep marsh green color that is perfect for this season and because of it's depth will really make the statement nails pop.

2. Paint the ring and middle finger with 2 coats of Taupe. This is going to be the base for our camo nails.

3. Using a dotting tool or if you don't have one a bobby pin will work too and Licorice begin placing random bent lines throughout the two nails. Allow to set.

4. Next picking up some Mink Muffs, begin placing the polish in random lines around the Licorice color. The more random the better. Allow to set to avoid any smudging or color run.

5. Using British Racing Green place the final set of random lines around Licorice and Mink Muffs, filling in any empty spaces on the nail. Allow to dry.

6. Finally place a top coat to help seal in your camo manicure and add extra shine. I use Essie Good To Go. It adds a gel like finish to the nails. My favorite!

That's it! Simple and on trend for Fall. As a final added step to keep your camo nails looking fresh add some cuticle oil. I love Essie Apricot Cuticle Oil. So nourishing and smells amazing.


What do you think of camo nails for Fall?


November 5, 2013

The Nail Files: Amethyst Glitter Holiday Nails

I feel like I haven't posted a manicure in forever and I was on Pinterest and Twitter this morning and the holiday talk is all jacked up! Christmas is officially on everyone's mind and I still have my Halloween wreath up on the front door. Nevertheless, it is that time again and I am really excited to join in on all this holiday spirit! With my favorite time of year fast appraoching I felt inspired today to share a holiday glitter nail polish look and a new Maybelline nail polish I just picked up! The fates are aligning.

I recently discovered the Maybelline Color Show Brocades Limited Edition collection. Whew- that's a mouthful. Anyway, I picked up the color 765 Amethyst Couture and I am in LOVE ❤❤❤.
It is a gorgeous deep rich intense purple [thus the amethyst] with small golden shimmer and large round light purple glitter suspended throughout. It is absolutely a must for the holiday season. This is such a unique color and glitter set up. You really have to see it for yourself.
So for today's look I simply painted one coat of Amethyst Couture and then painted my ring finger with a coat of Sephora by OPI's The Golden Age. I love how The Golden Age compliments the deep purple, something a little less traditional for the holiday season.

One thing that I find to be consistently true with the Maybelline Color Show polishes is that they dry on the matte side so I always make sure to follow up with my Essie good to go top coat. Also, something to mention if you do decide to grab this polish, it was a little tricky to apply, because of how big some of the glitter actual is, but I am willing to overlook the issue, because this color is so beautiful and these polishes are such a great price!

Have you tried a polish from the Maybelline Color Show Brocades collection? If not, what do you think of this polish for the holidays?


October 16, 2013

Halloween Mani: Easy Skulls #2


We are slowly but surely getting closer to Halloween and I couldn't be more excited! October is definitely a month with alot of anticipation and excitement. Last night I was up watching my second scary movie of the night and I plan to watch quite a few more.

That being said I knew going into October I wanted to do some fun Halloween themed posts and videos, so today I thought it would be fun to share another mani! So here we go....


So what you are going to need is a black, red and white nail polish. You can use which ever polishes you want but I used Essie in licorice, Essie in fifth avenue, and Sally Hansen White On. You will also need a nail art brush and dotting tool.


This nail art tutorial is super simple and it isn't too over the top- so it's wearable day to day.

1. Paint little finger, pointer finger, and thumb red. Leaving the middle and ring finger blank.

2. Paint the middle and ring finger white. Allow to dry.

3. Next, using the dotting tool and black polish draw eyes. Create a slight angle when drawing the eyes to give those skulls a bit of an evil eye.

4. Using black and the dotting tool again draw the skull's nose by simply drawing and upside down U shape.

5. Now it's time to draw on the skull's mouth. Using the nail art brush and black polish draw small vertical lines from cuticle to cuticle following along the fingernail tip.

6. Allow nails to dry and then paint a top coat over them so they are nice and glossy!

That's it you are all done!! Don't worry about making it too perfect. I think it looks a bit spookier with it slightly imperfect.


What do you think of this mani? Will you be giving it a try??

If you liked this Halloween Nail Art Tutorial please give it a tweet!!

October 10, 2013

The Nail Files: How To Grow Out Your Short Nails


DON'T FORGET TO WATCH IN HD FOR A BETTER VIEWING EXPERIENCE!

I know that for the past month or so I have introduced a little segment on my blog called 'The Nail Files' where I share tutorials and nail care tips! Well today I woke up and decided I would add in some videos to mix it up a little.

Today I share a few of my favorite tips when trying to grow out nails. Sometimes it can be super frustrating to do, but with the right products and a few secret tips it can be a breeze.

I hope you enjoy today's video and remember you can head over to my channel to subscribe for more nail care videos and beauty related fun!

Are you wearing your nails short or long for the Fall/Winter?

October 8, 2013

Easy Halloween Nail Tutorial: Skull & Crossbones


It's safe to say that I am officially in the spirit of Halloween! I have all my decorations pulled out and they are slowly but surely going up and today kicks off my October themed posts- it doesn't get better than this!

Today I was feeling inspired to share a Halloween nail tutorial that is really simple to do, but looks really put together and you will have everyone thinking you are a nail art ninja! So roll up your sleeves and let's get to work!

You will only be needing 3 components to this tutorial- black nail polish, dark glitter polish, and some spooky stencils. Here's what I used:

Essie in licorice
Wet n Wild in Night Prowl
Skull & Crossbone Stencils


Here's how you can achieve this nail look:

1. Paint all nails with Essie licorice, except for middle nail.
I love this black polish, because it is so incredibly black - I only use one coat.

2. Apply a coat of Night Prowl over the ring fingernail.

3. Apply skull & crossbones stencil to middle nail and paint one coat of black polish. Allow to dry completely before removing the stencil.

4. Paint tip of middle nail black, allow to dry and then apply a coat of Night Prowl over top.

5. Finish this spooky manicure off with a coat of topcoat. I love Essie good to go.

I love this nail look, because it is festive, but still wearable. Skulls, a little glitter, and black are always trendy- October or not. Wear it to school, the office, or out on the town!!


What do you think of this Halloween nail look?

September 25, 2013

The Nail Files: Maybelline Color Show Ageless Olive


It's no surprise that I am a nail polish addict-self admittedly I might add. Aren't you proud? With the changing of the seasons comes the changing of the nail polishes that I reach for and now that Fall is in full swing {If the Texas heat would let up} I have started a nice little jumping off point. {see my Top 10 Fall Nail Polish video here}

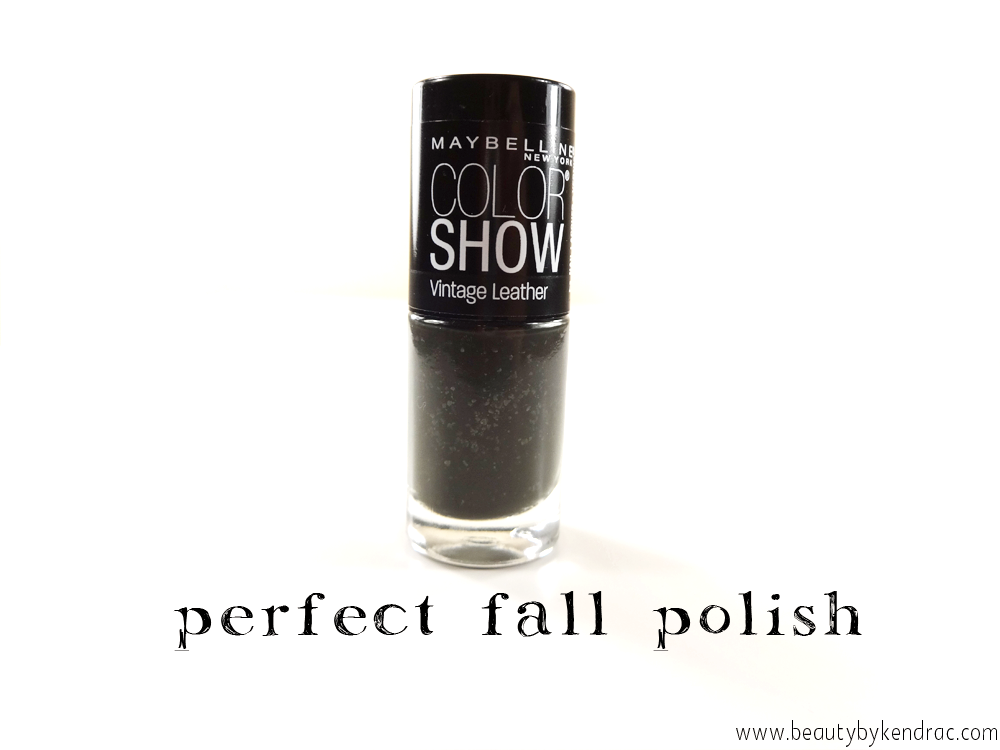
That being said one color that did make the list was from the Maybelline Color Show Vintage Leather Limited Edition collection in Ageless Olive. Peeps this polish color is a definite must have for this season.

First off it is such an amazingly deep murky green, what's even more is the fact that it is infused with tiny transparent flecks that give it the textured "look" without actually being textured to touch! Cool right?! I also love this polish because it is essentially a matte polish and that adds to the leather like appearance. While I do dig the matte option I fell in love with the color even more once I painted a coat of my trusty Essie good to go topcoat. The result is a vampy Fall nail color with a textured like look.

I will also gives props to this nail polish line, because at $2.99 a bottle it boasts a really great formula, abundant color selection, and on trend limited edition gems like this one! How can you go wrong? Needless to say I will be picking up a few other colors in this collection.

Have you tried polish from the Vintage Leather collection? What do you think of this one?


September 12, 2013

Top 10 Fall Nail Polishes


 WATCH IN HD FOR A BETTER VIDEO EXPERIENCE!!!!

Now that the season has officially turned and Fall is here {with the exception of Texas-still hot as heck here} I wanted to share my top 10 favorite nail polishes with you all!! This has to be one of my all time favorite videos to watch. I am like a kid at Christmas when people share their favorite Fall nail polishes.

I have put together a list of polishes that I will be reaching for over the next few months and I couldn't be more excited about my choices! I hope you enjoy and don't forget to comment and let me know what your favorites are!!


PRODUCTS MENTIONED:

OPI Lincoln Park After Dark, OPI Light My Sapphire, Maybelline Color Show Vintage Leather Collection in Ageless Olive, OPI Unfor-Greta-Bly Blue, Hard Candy Bity Blue, Essie for the twill of it, Butter London British Racing Green, Essie stylenomics, OPI Bogota Blackberry, Essie licorice

September 2, 2013

The Nail Files: Long Weekend Nails


This long weekend was final goodbye to the Summer months and a chance to welcome Fall. I knew that I was going to be busy with all of the festivities and wanted to give myself a manicure that I wouldn't have to think about. Less worry the better! One way I know to do that is to choose something with a glitter top coat! Less chance of chipping, since glitter polish tends to be pretty durable.

I thought I would do a quickie post to show you what I wore! First decision was a polish that was neutral so I selected Essie's ballet slippers. It is the prettiest pink and was the perfect color to leave summer polishes behind. Next, the glitter and this was easy for me! I picked OPI's Confetti Fun. It is a great glitter polish full of larger and smaller glitter pieces and a multitude of colors! It looks amazing over ballet slippers.

I hope you all had an amazing long weekend!! I sure did! Here's a look at my weekend nail duo......


What were you up to for the long weekend? What did you have on your nails?

August 27, 2013

The Nail Files: Polka Dot Nails


It's that time of year when Summer is transitioning into Fall and I couldn't be more excited. Don't get me wrong I love Summer, who doesn't? It's just that there are so many things that I love about Fall. Like the candle scents, cozy clothing, and the nail polish!

That is why I decided to do a nail post today! I wanted to show how you can make the transition from Summer polish colors to Fall polishes without feeling like to have to say goodbye to the brights and pastels or make the commitment to the darker polishes. Transitional nails make that possible and today's look was inspired by just that!

I used taupe and coral. Taupe representing the coziness that comes with Fall and coral the Summer months of warmth and fun! I wore coral like crazy over the Summer! What was your Summer polish color of choice?

Remember if you don't have these exact polishes don't worry, use whatever you have that is similar!

So, if you want to find out how I completed this transitional nail art here you go......


First the colors I used: {left to right}

Sally Hansen Hard as Nails in White On
love & beauty from Forever 21 in Taupe
Sally Hansen Hard as Nails in Coral Reef

Tools:

A dotting tool
Paper towel

Here's How:

Paint all nails except for the little finger using Taupe. I like to paint 2 coats so it is a solid base color.

Paint the little finger with 2 coats of Coral Reef.

Allow nails to dry.

Next, drop a small amount of Coral Reef and White Out onto a paper towel.

Now the fun part! Using the dotting tool and White On create a mix of smaller and larger dots in a random pattern following along the outside cuticle from base of cuticle to tip.

Using a clean dotting tool and Coral Reef dot randomly between the previous made dots.

Allow to dry and then apply a top coat. My favorite is Essie good to go!

It's that simple and looks really put together but fun! I love the coral and taupe, I think they really compliment eachother well!

What do you think of transitional nail art? Using 2 opposite, but complimentary seasonal polishes together to connect Summer and Fall polishes.


July 9, 2013

Nails Of The Day: China Glaze Neon & On & On

Follow on Bloglovin  
I picked China Glaze Neon & On & On from the Sunsational Collection {Summer 2013} a few days ago and I have been impatiently waiting to put it on my nails. In my opinion it is the perfect pink polish for this summer and it will look amazing on all skin tones.

It is a creme polish formula which requires a bit of extra play, but honestly with a color this perfect it is worth a few extra brush strokes. The picture above features 2 coats of polish followed by a coat of Essie good to go for extra shine! I personally like the look of China Glaze nail polish with a top coat applied.
If you are looking for a pink summer polish look no further. I picked up my polish at Ulta. You can purchase the collection individually or in a set!! I will definitely be going back for a few other colors in the collection.  

Will you be trying this collection??


July 4, 2013

Nails Of The Day: July 4th Nails


Follow on Bloglovin
Happy 4th of July everyone!! I am so happy to be celebrating my very first 4th of July here in Texas! I can't wait for tonight. We are going to see the fireworks, eat some good food and just enjoy being here!!

Because I am a bit of a nail polish addict I thought I would join the festivities with a manicure salute to this July 4th!! I went with the traditional red, white & blue, but then added a bit of multicolored glitter to jazz up the manicure.


What are you wearing on your nails this 4th of July?? 

June 3, 2013

Manicure Monday:Summer Neon Nails

Happy Monday!! I hope you all had a great weekend!! I was so excited to dive right into June and it actually starts to feel like summer once June hits! So I spent my days by the pool and couldn't think of a better time to break out the neon nail polish! So neon inspired this week's Manicure Monday post!!


I am completely obsessed with this color from Orly called Glowstick, it is the perfect neon highlighter yellow! I picked mine up at my local Ulta! I love how it really has that punch of color! I think that this would look amazing on the toes too!! 

Here's a little trick with neon polishes....ready....paint a coat or two of white polish underneath to give it that extra pop!! It really does bring neon colors to life!!

I recommend this to anyone looking for some really bright fun polishes for this summer!!


Will you be wearing neon polish this summer??